

Gyaru Brows 101: Eyebrow Grooming & Styling Guide WITHOUT SHAVING!
- GYARUSAN
- Feb 24, 2023
- 4 min read
Welcome back, gals!
As requested, here is a tutorial for you! I have seen that many baby gals and even intermediate gals struggle to do their eyebrows in a suitable way for gal style.
I've created this step-by-step guide to grooming your eyebrows so that you can improve your galmake!
First, let's look into some inspiration from Japanese gyaru.

Check out all these brows from Koakuma Ageha models!
As you can see, gyaru brows can vary in shape and size, however what they have in common is the color! Generally speaking, gyaru brows are the same color or lighter than the hair. Keep this in mind when coloring your hair and doing makeup!
The focus of galmake is the eyes, so you generally want everything else to be subdued, including the brows. Notice how these Ageha models' brows almost blend in with their skin.
Although straight brows like Tomoyo's (#9) are less common in gal, they've definitely made a resurgence in the past few years! However, if you want to stick to "traditional" gal, high arched brows are recommended.
Now, let's discuss how exactly to get these brows!
Mine are not perfect, but I wanted to show in detail how I groom my brows to my liking. I invite you to try out my tips and see how they work for you!

First, tools of the trade! You will need scissors, a razor, and tweezers!

Start with clean and bare brows. Make sure to cleanse your face and remove any makeup.
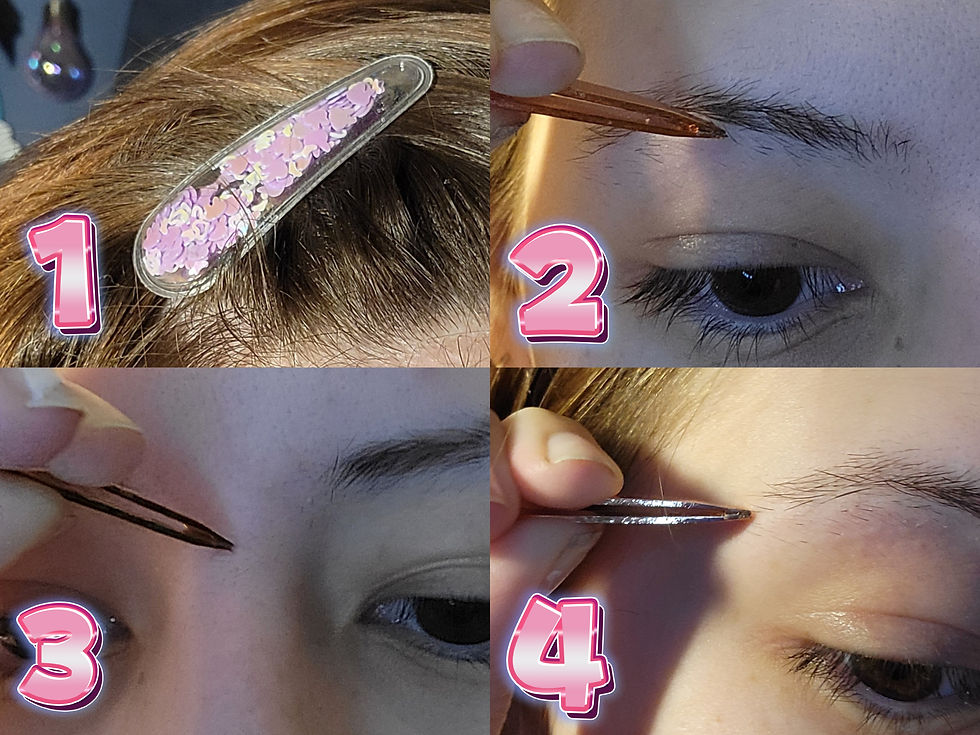
Follow along with me! Let's tweeze our stray hairs! Step 1: Clip your bangs out of the way so we can see the brows well. Step 2: Carefully tweeze the stray hairs underneath your brow shape. If you pluck too much and leave a hole, it's okay!
Step 3: Pluck any hairs you have between your brows. This helps you keep a smooth makeup application.
Step 4: Pluck hairs around the tail of your brow. Personally, I tend to grow a lot of hairs in this area, so it's important for me to tweeze so I can maintain a sharp arched brow!

Notice how much cleaner it looks just from plucking! You can clearly see the shape of the brow.

Part two: shaving!
This is a cheap facial razor used for dermaplaning and removing peach fuzz. You can get these at any drugstore, beauty supply, or online!
Step 1: Going with and against the grain, shave off any remaining hairs or dead skin in between the brows. Again, this helps your makeup application go more smoothly!
Step 2: Pushing downwards towards the brow, shave off any dead skin or stray hairs above the brow.
Step 3: Immediately after shaving above the brow, push the razor down a little lower to remove the short fuzzy hairs on top. This keeps your brows looking polished and less bushy!
Step 4: Make sure to shave any hairs you missed under the brow. I follow along my brow shape and make sure that the tail looks crisp and polished.
Make sure to follow these next steps well! I've found that this part is CRUCIAL to making the difference between regular well-groomed brows and gyaru brows!

Here you will need a lash comb or spoolie brush. Personally I prefer a comb! I got mine at Daiso for $1.50, but you can probably get one at any beauty supply or drugstore!
Step 1: Brush the brow upwards as much as possible. You will see long hairs sticking out from the shape of the brow.
Step 2: Cut these brushed hairs to the top of your brow. You may need to repeat these two steps, depending on how thick and long your brow hairs are. To make sure it's done, no more hairs should stick up when you brush; all the hairs should be contained to the shape of the brow.
Step 3: For additional long brow hairs that are hiding, I cut them scissor-over-comb. This ensures that you don't cut them too short or make a hole, since the comb makes a barrier between the hairs and the scissors.
Step 4: Similar to step 2, you will repeat the process, but brush the hairs downward. Cut any hairs that hang past the brow. You can also repeat step 3 and cut scissor-over-comb, brushing downward.

Here's a before and after of just grooming. Notice how my eyes look much more open and I have more lid space for makeup!
Lastly, we will apply makeup!

Tools you will need! A brow pencil of your choice, brow mascara, and (optional) highlighter or concealer.
Gals are known for their blonde brows, and most of them don't bleach or otherwise color them! The secret is Heavy Rotation! This is a gal's best friend. I haven't tried many other brands, but Heavy Rotation Coloring Eyebrow has been a gal staple for years. Most gals achieve their blonde brows with shade 01 - Yellow Brown, but I used 03 - Ash Brown since it is more natural and suits my hair color.

Step 1: Fill in your brow lightly with your brow pencil. Personally, I am a fan of this taupe shade from Loreal as I noticed most blonde shades available in the US are too dark or too warm. This taupe comes out as a very natural ash shade. Another option that is extremely popular with gal is BiBo Eyeful Eyebrow Pencil. The shade Yellow Brown matches the Heavy Rotation very well, and both are used in many tutorials by famous gyaru, such as Harutamu.
Step 2 & 3: Apply your concealer or highlight above and below the brow. Blend well with fingers or sponge.
Step 4: The most important part! Using your brow mascara, paint the hairs against the grain. Get as close as you can to the roots without touching the skin, because it will leave a mark. Then, go with the grain and paint the hairs. Your brows should be more solid in color now! Finish up by using the mascara as a gel to set your hairs in place. You can also add nose shadow at this step!
You did it! Did you like my tips? Here's how mine came out!

It's a big difference compared to how it started, right?
Let's look at some more tips from Japanese gyaru!


The process looks pretty similar, right!?
Use these guides to your advantage, and let me know what you think!
Thank you for reading♡
with love
GYARUSAN


Comments